

Keyboard Tool Guide
Choose the correct tool before you pull
A keycap puller, a switch puller and a switch opener do three different jobs. Using the right tool, checking the keyboard construction and stopping when resistance feels wrong matter more than pulling harder.
Keycap puller vs switch puller: the quick answer
| Task | Correct tool | What it grips | Important limit |
|---|---|---|---|
| Remove a keycap | Wire or plastic keycap puller | Opposite sides under the keycap | Pull the cap, not the switch housing |
| Remove a mechanical switch | Switch puller | Housing release clips | The keyboard must support switch removal; soldered switches need desoldering first |
| Open a loose switch housing | Compatible switch opener | Housing latches after the switch is out | Opener geometry must match the housing |
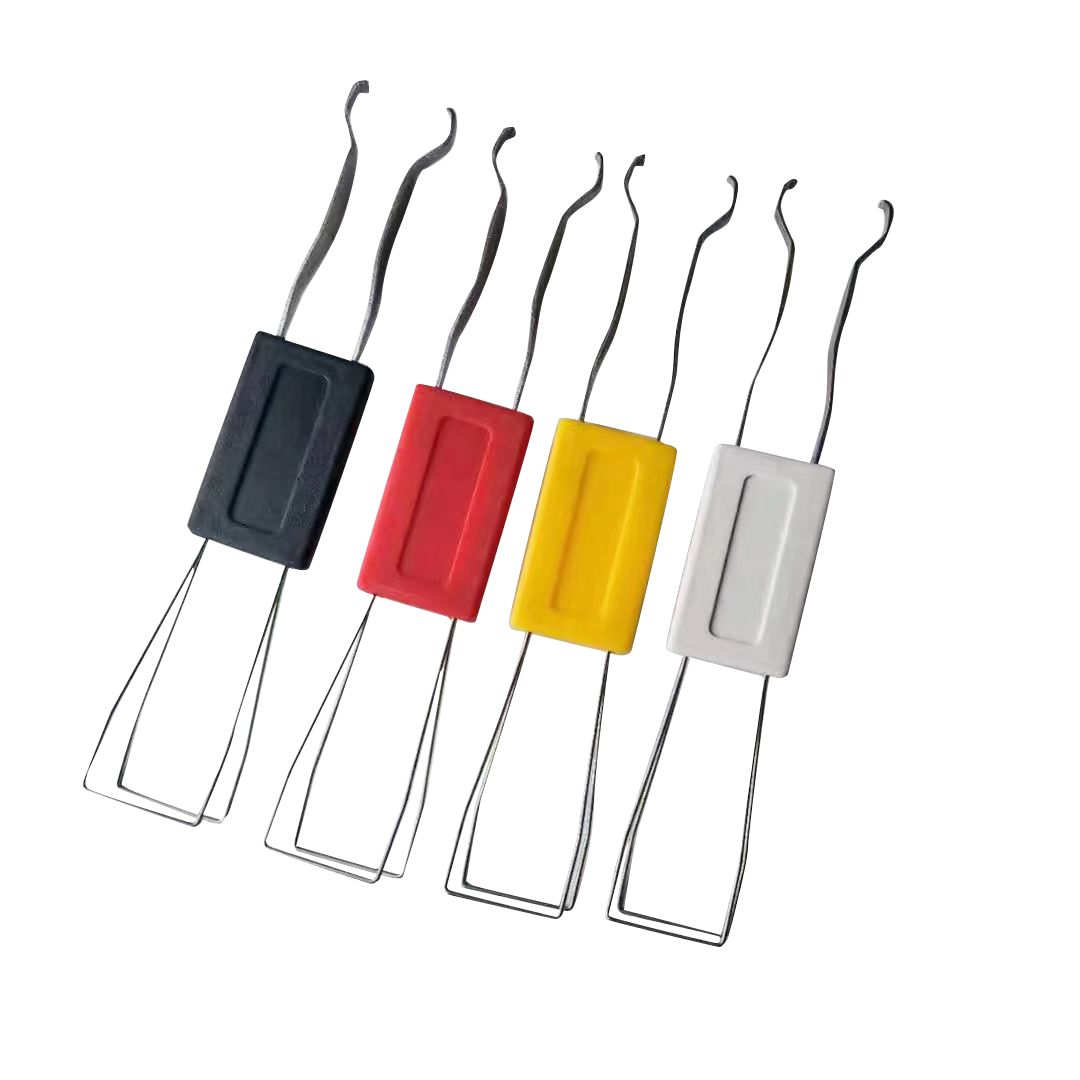
A 2-in-1 tool combines a keycap-pulling end and a switch-pulling end. It does not mean every switch, keycap or keyboard is compatible.
Wire vs plastic keycap pullers
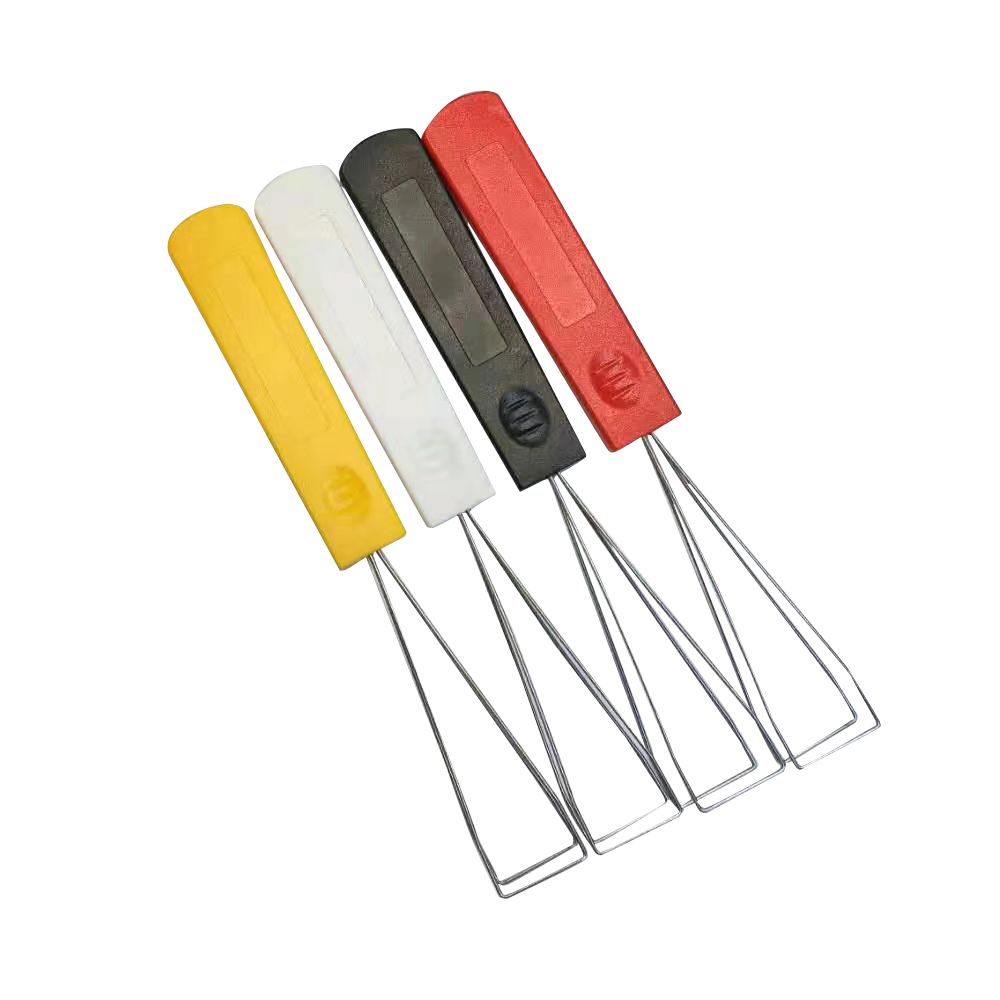
A wire puller reaches under two opposing edges and spreads the lifting force. It is usually the better default for thick, glossy or frequently changed keycaps because less tool surface rubs against the cap sidewalls.
A plastic ring puller is compact and inexpensive, but its rigid jaws may press against the sides of a cap. It can also be awkward around larger keys. Neither style prevents damage when used at an angle or with excessive force.
For a store, repair bench or sample kit, start with a wire puller and test it on the cap profiles your customers actually use.
How to remove a keycap safely
- Disconnect the keyboard. Check its manual and warranty instructions before removing parts.
- Position the puller evenly. Slide both wire loops under opposite sides of the keycap.
- Lift slowly and vertically. Keep the force centered. Do not twist a cap against the switch stem.
- Use extra care on stabilized keys. Space, Enter and Shift may use stabilizer parts that need model-specific handling.
- Keep removed caps in order. This prevents layout mistakes during reassembly.
Before using a switch puller
First confirm whether the keyboard is hot-swappable or soldered. A hot-swap socket allows a compatible switch to be removed without soldering. A soldered switch must be desoldered before it can be taken from the plate and PCB.
Do not judge only by the switch brand or stem shape. Check the keyboard manual, PCB type and switch mounting support. If these details are unclear, stop and ask the keyboard manufacturer.
How to use a switch puller without scraping the plate
- Remove surrounding keycaps. Clear enough space to see the housing and release clips.
- Find the clip direction. Many regular switches release from the north and south sides. Some low-profile designs use different clip positions, including east and west. Follow the keyboard or switch instructions.
- Seat both tips on the housing clips. The puller should compress the plastic releases, not slide across the metal plate.
- Pull with steady vertical force. Keep the tool centered. Do not lever one side against the plate.
- Stop when the switch stays locked. Recheck clip contact, tool thickness and whether the switch is soldered. More force is not the fix.
- Inspect before reinstalling. Check the switch pins and socket for bending, debris or damage, then align the pins before pressing the replacement switch into place.
A careful technique reduces scratch risk, but no puller can guarantee a mark-free result on every plate finish. Test a sample tool on the actual keyboard model before using it at scale.
Why switch puller shape matters
The tips must be thin enough to reach the release clips and stiff enough to compress them without folding. If the tips are too thick, too flat or poorly aligned, they may slip onto the plate instead of gripping the housing.
Regular-profile and low-profile switches can place their clips differently. A puller that works on one keyboard is not automatically suitable for another. Compare the tool tip, switch housing and plate clearance before ordering a large batch.
Switch opener compatibility: check the housing latches
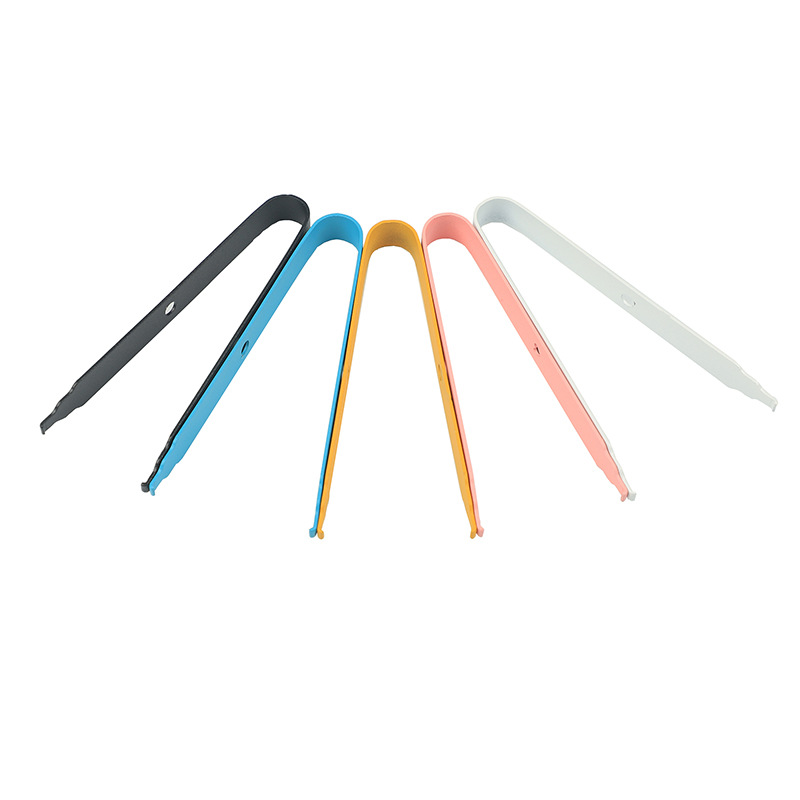
A switch opener is used only after the switch has been removed. Openers lift the upper-housing latches so the switch can be inspected, repaired or lubricated. MX-style, Kailh-style and low-profile housings may use different latch layouts.
Do not rely on a broad compatibility label. Compare the bottom of the actual switch with the opener posts and confirm which housing families the product supports. For mixed repair work, carrying more than one opener geometry is often safer than forcing one tool.
When a switch will not come out
Resistance is useful information. Stop and inspect before the plate, housing or socket is damaged. First check that both puller tips are pressing the release clips instead of resting on the plate. Then confirm that the switch is hot-swappable and that no plate foam, case edge or stabilizer part blocks the tool.
If one side releases but the other remains locked, reset the puller and compress both clips together. Avoid twisting the housing. A switch that was installed at an angle may have a bent pin, while a socket moving with the switch can indicate a PCB problem that needs repair rather than more pulling force.
After removal, inspect the housing clips and metal pins under good light. Straighten a slightly bent pin only when you understand the risk; replace a cracked housing or seek repair help when the socket or PCB looks loose.
Buying checklist for stores and repair services
- Test sample tools on the keyboard models and switch families you serve.
- Confirm tool material, overall size, tip width and finish from the current product specification.
- Check whether a 2-in-1 tool provides both functions your buyer expects.
- Use product photos that show the working ends clearly, not only the handle color.
- Ask about neutral packing, custom logo or packaging before promising them to customers.
- Include a short use and compatibility note to reduce preventable damage and returns.
- Start with a small mixed sample, then restock the tools that fit real customer demand.
Check the keyboard maker's instructions
Removal direction and clearances vary by keyboard. Manufacturer guidance remains the final reference for a specific model. For examples, review the HHKB switch removal guide, Dygma switch-changing instructions and Razer mechanical switch guide. These references agree on checking hot-swap versus soldered construction, using the correct tool and avoiding excessive force.
Need pullers for a store or repair kit?
GeekSocial supplies wire keycap pullers, dedicated switch pullers, 2-in-1 tools and matching switch openers for one-piece testing, mixed orders, dropshipping and reseller batches. Compatibility, stock, packing and customization depend on the selected SKU and order.


 Email
Email WhatsApp
 09:00 - 22:00
 Leave a message